You know what’s annoying? When your heating’s on full blast, but your house still feels chilly. And those radiators making weird gurgling sounds? Let me tell you, how to bleed a radiator is one of the easiest home maintenance jobs you can do, and it makes a HUGE difference!
Honestly, radiators that haven’t been used much over the summer often get cold spots at the top because air gets trapped inside. Skipping this simple task means your heating system just won’t work as well as it should. Plus, you end up wasting energy (and money!).
But don’t worry! Bleeding a radiator sounds technical, but trust me, it’s super simple. We’re talking maybe 20-30 seconds per radiator. I’ll walk you through every step, the right way. Doing this regularly keeps your boiler pressure happy, makes your home consistently warm, helps your heating system run smoothly, and can even keep those energy bills down. What’s not to love?
Why Your Radiator Needs Bleeding: Signs to Watch For
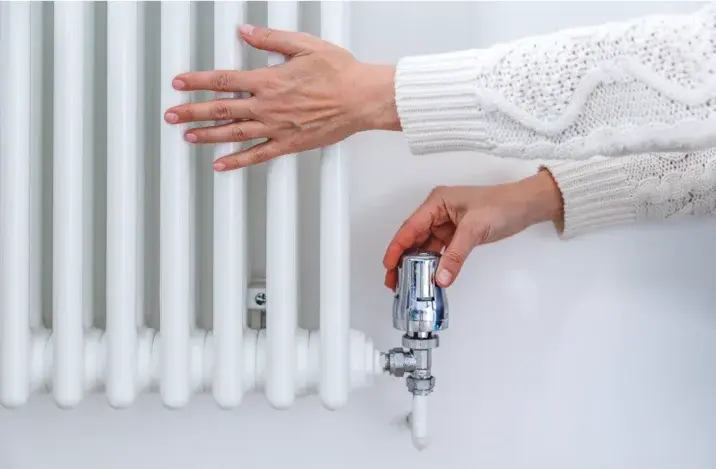
Image Source: Serviceteam
So, how do you know if trapped air is messing with your heating? It’s actually pretty easy to spot once you know the signs. Let’s look at the most common clues that tell you it’s time to bleed your radiator.
Cold spots at the top
Go on, give your radiator a quick feel (carefully if the heating’s been on!). Is the bottom warm but the top part feels much cooler? That’s almost always trapped air.
Air is lighter than water, so it naturally floats up and gets stuck at the top of your radiator. Because air is rubbish at conducting heat compared to water, these trapped pockets stay cold, even when your heating is trying its best. You’ll often notice a pattern: warm at the bottom, cooler towards the top. The bigger the difference, the more urgently you need to bleed that radiator! I’ve found the radiators upstairs tend to collect air more often than the downstairs ones, simply because air rises.
Strange gurgling or banging noises
Your radiators should be silent heroes, warming your home without a fuss. If you hear bubbling, hissing, or gurgling sounds coming from the radiators or pipes, that’s a classic sign of trapped air trying to move around. It usually happens when water tries to flow past these air pockets, or when the air bubbles themselves move through the system.
Banging or knocking sounds can be a bit more worrying. While they can point to major air blockages, sometimes they might indicate a boiler issue called ‘kettling’. You’ll probably notice these noises most when you first turn the heating on after it’s been off for a while, especially after the summer break.
Radiator taking ages to heat up
This one’s a real pain! If air is taking up space where hot water should be, your radiators become way less efficient. Your house might take much longer to warm up, or some rooms might never feel properly cosy, even if the heating’s been on for ages.
It happens because the trapped air stops the hot water circulating properly. Your boiler ends up working harder, trying to push heat around, but it just can’t get everywhere evenly. If you’ve got some radiators heating up quickly while others stay stubbornly cold, air pockets are likely causing an unbalanced system.
Learning how to bleed a radiator and doing it at least once a year (usually before winter hits) is a brilliant way to keep your heating system working efficiently. The best part? It literally takes minutes, saves energy, and keeps your home feeling warm and comfortable. It’s a win-win! For keeping your home extra cosy and efficient, especially in damper months, you might also want to check out the best dehumidifiers, as good heating and moisture control often go hand-in-hand.
Essential Tools for Properly Bleeding a Radiator
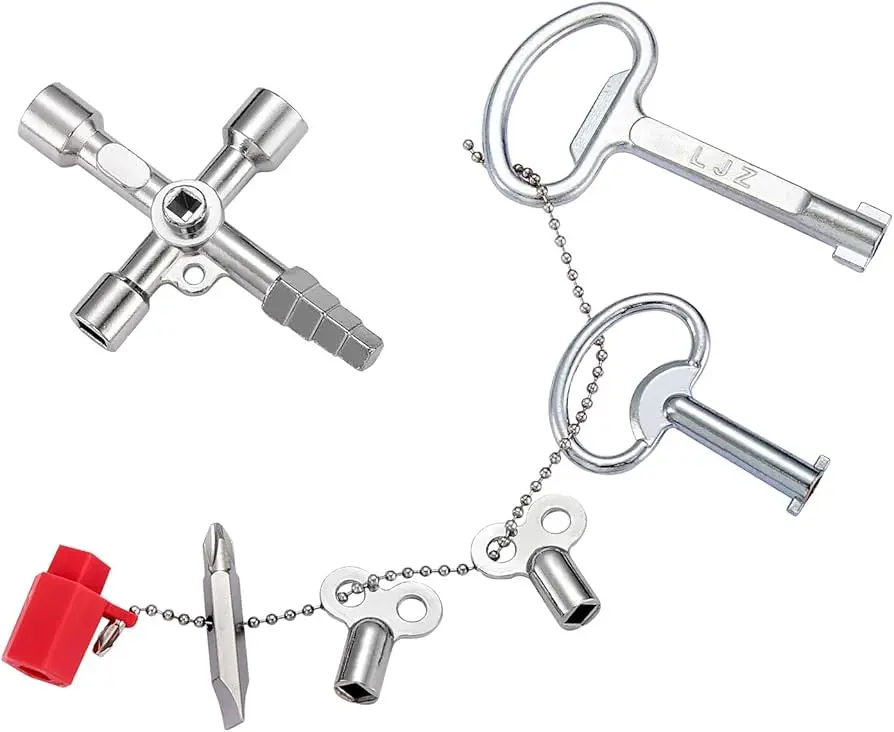
Image Source: Amazon UK
Right, let’s get our gear ready! You only need a few simple things to bleed your radiator, and you probably have most of them lying around the house already. Getting organised first makes the whole process quick, clean, and totally painless.
The radiator bleed key (and alternatives)
Your main weapon is the radiator bleed key. It’s usually a small, L-shaped bit of metal designed to fit perfectly into the bleed valve on your radiator. Good news – most modern radiators use a standard size, so one key should fit all the radiators in your home. If your radiators are ancient (like, over 30 years old), you might need an older imperial-sized key, but it’s less common these days.
But don’t panic if you can’t find a bleed key! You can often use these alternatives:
- Flat-head screwdriver: Many modern radiators have a slot in the bleed screw that a flat-head screwdriver fits perfectly.
- Allen key (hex key): Some valves have hexagonal openings that match an Allen key.
Honestly though, a proper radiator key costs pennies from any DIY shop and is the best way to avoid damaging the valve. Please, please, please don’t try using pliers or a cross-head screwdriver – you could easily wreck the bleed valve for good!
Containers and cloths for catching water
Things might get a tiny bit drippy, so make sure you have these handy:
- Small container or bowl: Pop this directly under the bleed valve to catch any water that comes out. A small yoghurt pot or old mug works great!
- Old towel or cloth: Lay this on the floor underneath the radiator, just in case of splashes. Protect that carpet or flooring!
- Another cloth: Keep one spare for wiping up drips and to help you get a better grip on the key or valve if it’s a bit stiff.
You can even buy fancy gadgets that combine the key and a little water catcher, which are quite neat if you plan on doing this often.
Safety equipment considerations
Okay, it’s a simple job, but safety first, always!
- Cool it! Make sure your heating is OFF and the radiators have cooled down completely before you start. Trust me, you don’t want to get scalded by hot water or steam.
- Gloves (optional but wise): A pair of safety gloves isn’t a bad idea when dealing with heating systems.
- Old clothes: Wear something you don’t mind getting a bit grubby. The water inside radiators can sometimes be murky or contain rust particles.
Get everything ready near the first radiator before you begin. Being prepared makes the job safer and stops any accidental water spills.
Step-by-Step Guide to Bleed Your Radiator
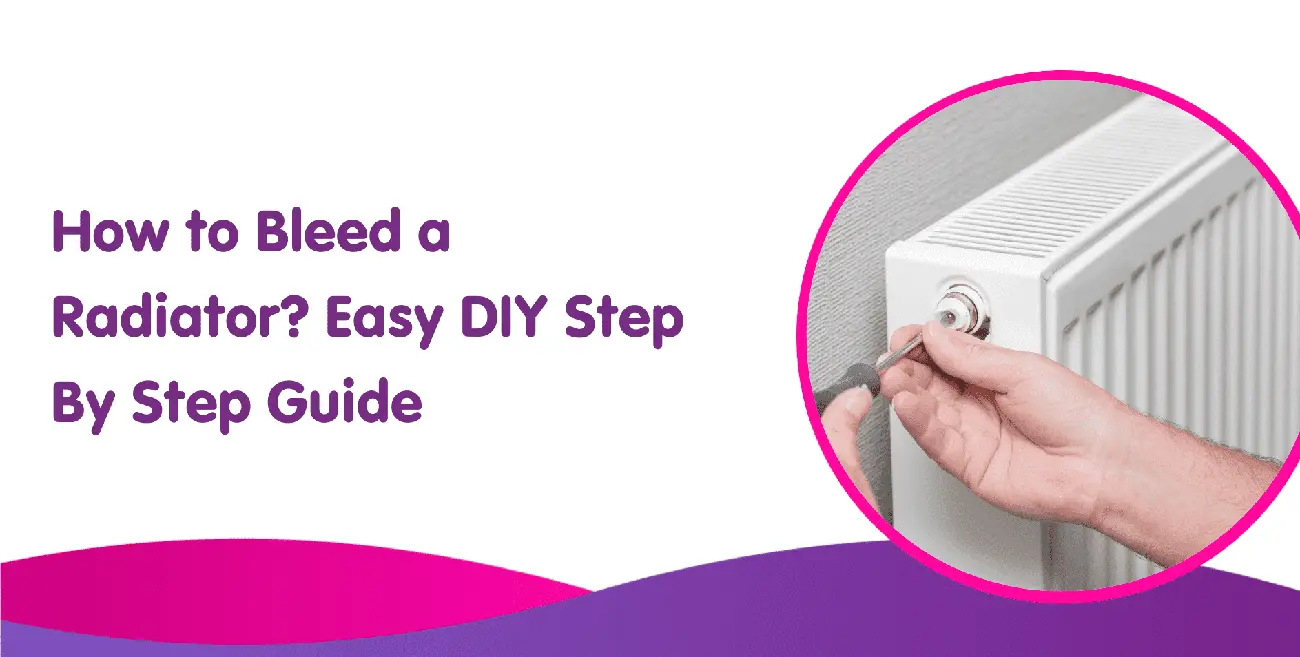
Image Source: Boiler Central
Right, you’ve spotted the signs, you’ve got your tools lined up – let’s get hands-on! Learning how to bleed a radiator is incredibly straightforward. Trust me, this simple process takes just a few minutes per radiator but makes such a difference to how warm and cosy your home feels. Let’s do this!
1. Turn off your heating system and WAIT
First things first, safety! Switch your central heating system completely OFF. This stops boiling hot water potentially spraying out when you open the valve. Now, the slightly boring bit – you need to wait for the radiators to cool down completely. Give it a good hour, maybe even two. Honestly, waiting protects you from nasty burns from hot water or steam. Don’t skip this!
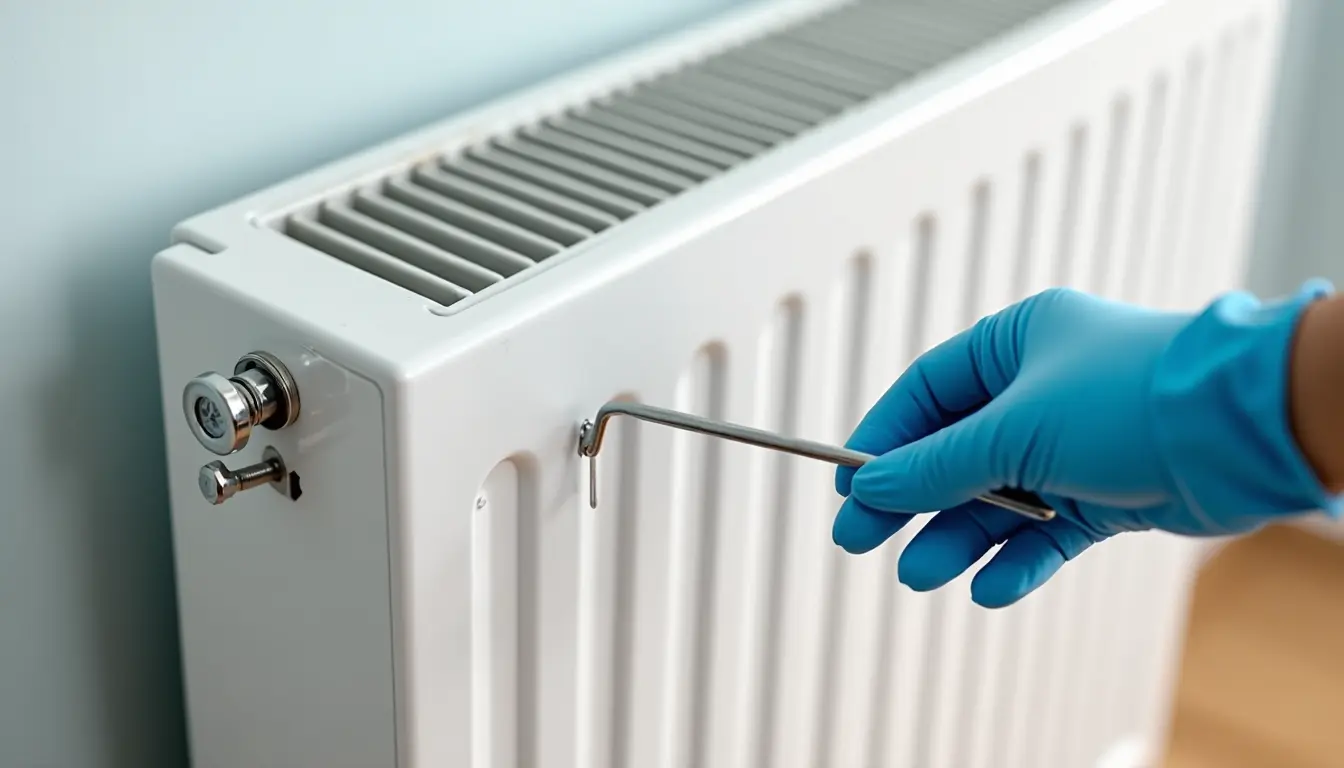
2. Find the bleed valve
Have a look at the top corner of your radiator. You’re looking for the bleed valve – it’s usually a small, round hole with a square bit inside it. If you’ve got a double radiator (one with two panels), you’ll likely find a valve on each panel, so be prepared to bleed both.
3. Get your container and cloth ready
Before you touch that valve, pop your old towel or cloth on the floor right under it. Place your container (that yoghurt pot or mug!) directly underneath the bleed valve. This dynamic duo will catch any drips and save your floors from any murky water marks.
4. Gently insert the key and turn SLOWLY
Carefully slot your radiator key (or your screwdriver/Allen key alternative) into the bleed valve. Now, slowly turn it anti-clockwise. You only need to turn it about a quarter or half turn – just enough to hear the air start escaping. Don’t go mad and open it fully, or you might get more water than you bargained for! Easy does it.
5. Listen for the hiss (that’s the air escaping!)
You should hear a distinct hissing sound. That’s the trapped air making its grand escape! This is exactly what you want. The hissing might last just a few seconds or maybe up to a minute, depending on how much air was trapped in there. Just let it hiss away.
6. Close the valve quickly when water appears
Keep listening! As soon as the hissing stops and a steady trickle of water starts coming out (instead of air), quickly turn the key clockwise to close the valve again. Nip it up so it’s tight enough to stop the water, but don’t overtighten it like you’re trying to crack a walnut! You could damage the valve, making it tricky the next time you need how to bleed a radiator.
After Bleeding: Important Checks to Make
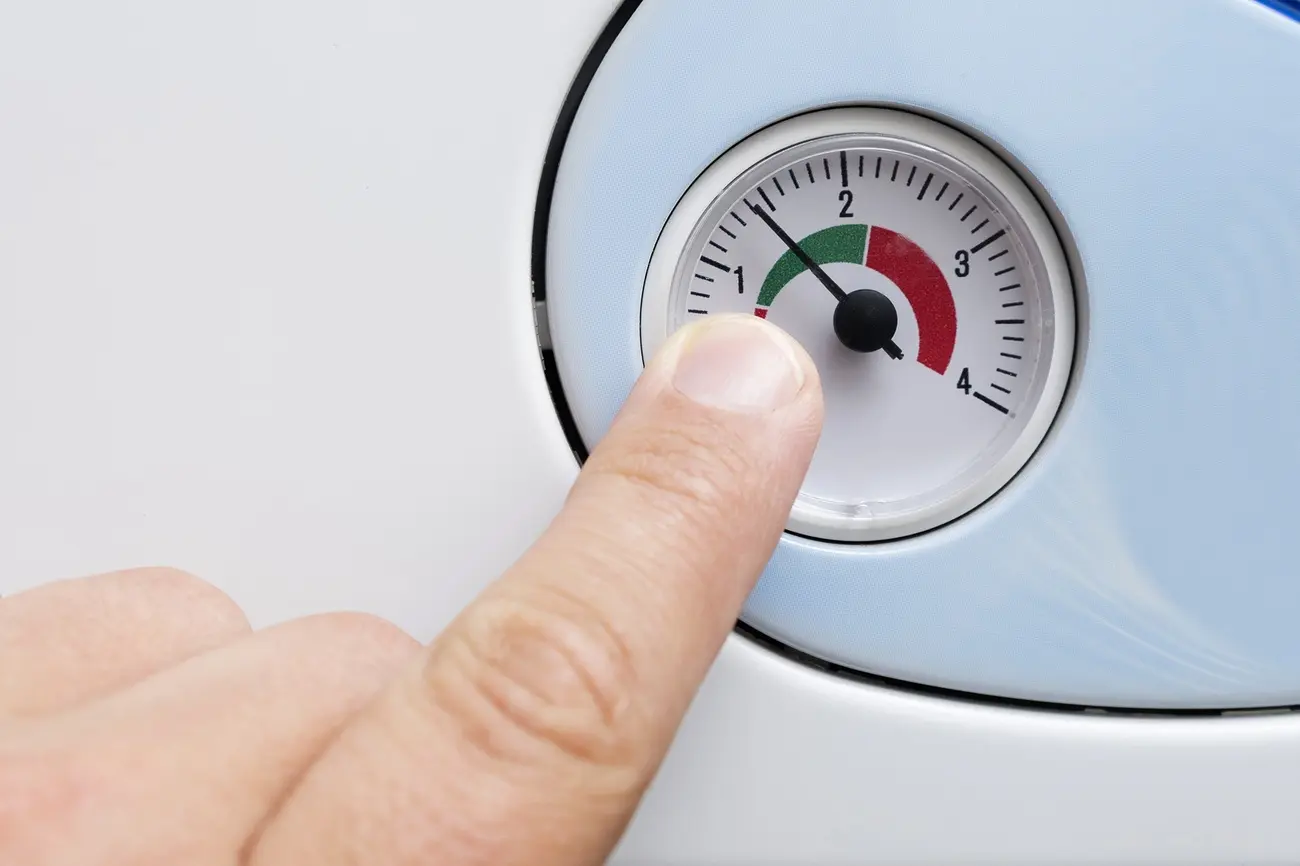
Image Source: Parkstone Yorkshire
Woohoo! You’ve let the air out. But hold on, we’re not quite finished yet. Doing a couple of quick checks after bleeding ensures your heating system runs efficiently and safely.
Checking your boiler pressure
Letting air out of the system will almost always cause the pressure in your boiler to drop. Find the pressure gauge on your boiler (it usually looks like a little dial). When the heating is running, it should ideally read between 1 and 2 bar. When the system is cold (like after you’ve just bled the radiators), a reading between 1 and 1.5 bar is generally fine.
If the pressure has dropped below 1 bar, you’ll need to top it up (repressurise the system). Here’s how:
- Find the ‘filling loop’ – it’s often a silver braided hose near your boiler with one or two small levers or taps.
- Slowly open the valve(s) on the filling loop to let cold water into the system.
- Keep a close eye on the pressure gauge!
- Once it reaches the sweet spot (around 1.5 bar when cold is usually good), firmly close the valve(s) again.
Be careful not to let the pressure go too high (usually above 2.75 bar is bad news, your boiler manual will specify). If you accidentally overfill it, you’ll need to release some pressure by carefully bleeding a tiny bit more water from a radiator.
Testing radiator heat distribution
Right, time for the moment of truth! Turn your heating back on and let it run for a good 15-20 minutes. Now, go around and check each radiator you bled. Carefully run your hand over the surface – it should feel warm all over, from top to bottom. Success!
Still got cold spots? Annoying! It could be:
- Not quite enough bleeding: Maybe there was still a tiny bit of air? Try bleeding that radiator again for a few more seconds.
- Sludge build-up: Over time, gunky sludge can build up inside radiators, stopping water flow. This usually needs a professional power flush to sort out.
- Valve issues: The thermostatic radiator valve (the one with numbers on it) might be faulty.
- Low pressure: Double-check that boiler pressure again!
If you consistently have issues with some radiators being colder than others, your system might need professionally ‘balancing’ to make sure water flows evenly everywhere.
When should you bleed other radiators?
It’s best practice to bleed all your radiators at least once a year, ideally just before winter kicks in properly. Think of it as a little MOT for your heating system! This ensures maximum efficiency when you need that warmth the most.
A good strategy is to start downstairs and work your way up, as air naturally rises, meaning the highest radiators often trap the most air. And of course, if you start hearing those tell-tale gurgling noises or notice rooms aren’t heating up properly any time of year, give the likely culprits a quick bleed.
Regularly knowing how to bleed a radiator and actually doing it helps cut your energy use, keeps your home comfortable, and can even help your heating system last longer. Simple!
So, What’s the Verdict on Bleeding Radiators?
So there you have it! Learning how to bleed a radiator really is a simple but super important job every homeowner should feel confident doing. Honestly, it’s one of the simplest bits of home maintenance you can tackle yourself.
Taking just 20-30 seconds per radiator might not seem like much, but it makes a massive difference to how well your heating works. Bleeding your radiators regularly means a warmer home during those chilly British months, potentially lower energy bills (yes, please!), and it helps you spot small issues before they turn into big, expensive repairs. Who wouldn’t want that?
Make checking and bleeding your radiators part of your regular home care routine, especially before winter. With the right tools (which are super cheap and easy to find!) and this guide, you’ve got everything you need to keep your heating system running sweetly, your home lovely and warm, and those energy costs under control. Trust me, a happy, air-free radiator system means reliable warmth right when you need it most!
Your Radiator Bleeding Questions Answered (FAQs)
Got a few more questions about how to bleed a radiator? No worries, I’ve got you covered! Here are some common queries:
Q1. How long does it actually take to bleed one radiator?
Seriously, it’s super quick! For a single radiator, you’re typically looking at just 20-30 seconds of actual bleeding time (the hissing bit!). The whole process per radiator, including getting your cloth ready, might take a minute or two. The total time for your whole house just depends on how many radiators you have and how much air is trapped inside them.
Q2. What are the main signs my radiator needs bleeding?
Look out for these tell-tale signs:
- Cold patches, especially near the top of the radiator when the bottom is warm.
- Weird noises like gurgling, bubbling, or hissing coming from the radiator or pipes.
- Radiators taking much longer than usual to heat up properly. These nearly always mean trapped air needs releasing through bleeding the radiator.
Q3. Do I need special tools for radiator bleeding?
Your main tool is a radiator bleed key, which you can buy cheaply from any DIY store. It’s made to fit the valve perfectly. But, if you’re stuck, a flat-head screwdriver often works on modern radiators, or sometimes an Allen key fits. Don’t forget you’ll also need a cloth to protect your floor and a small container (like an old mug) to catch any drips!
Q4. Should I bleed all the radiators in my house at once?
Yep, it’s a good idea! Making it an annual job, ideally before winter, is the best approach for how to bleed a radiator efficiently. Start with the radiators downstairs and work your way up, because air tends to collect more in the highest ones. Of course, if you notice specific radiators acting up (cold spots, funny noises) at any other time, just bleed those problem ones as needed.
Q5. What should I check after I’ve bled my radiators?
Great question! Once you’re done bleeding, always check your boiler’s pressure gauge. Bleeding lets air out, which can lower the pressure. It should ideally be between 1 and 1.5 bar when the system is cold. If it’s dropped below 1 bar, you’ll need to top it up using the filling loop (check your boiler manual!). Also, once you turn the heating back on, give it 15-20 minutes, then quickly check that each radiator is heating up evenly from top to bottom.