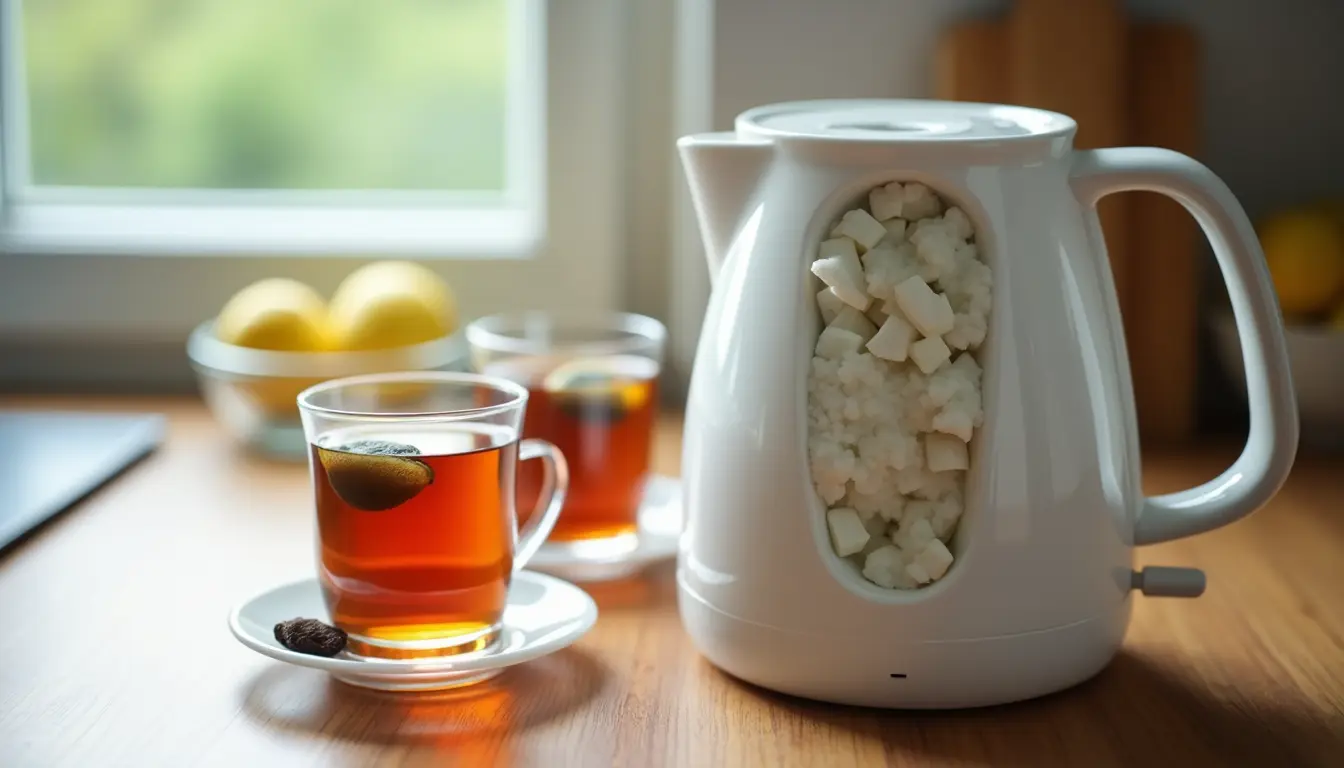
Want to make your daily cuppa taste miles better? Honestly, the secret often lies hidden inside your kettle! We Brits get through a staggering 100 million cups of tea every single day – that’s about 36 billion brews a year. But if your kettle is full of limescale, you’re probably not getting the perfect taste you deserve. It’s time to learn how to descale a kettle and get that flavour back!
That annoying white crusty stuff? That’s limescale, and it builds up when the calcium carbonate and magnesium left behind by hard water evaporating get heated up. Trust me, it can leave your tea tasting weirdly metallic. See little white flakes floating in your mug? Yep, that’s a sure sign your kettle needs a good descale.
But it’s not just about taste! Limescale seriously messes with your kettle’s heating efficiency. That horrible layer forces it to work much harder, using more energy just to boil the same amount of water. The good news? You can easily clean your kettle using simple things like vinegar, or grab a specialised limescale remover – both work brilliantly.
Making sure you descale your kettle regularly – I’d say every 1 to 3 months, depending on how hard your water is – means your tea will taste amazing again, and your trusty kettle will last much longer.
How Limescale Ruins Your Tea and Kettle
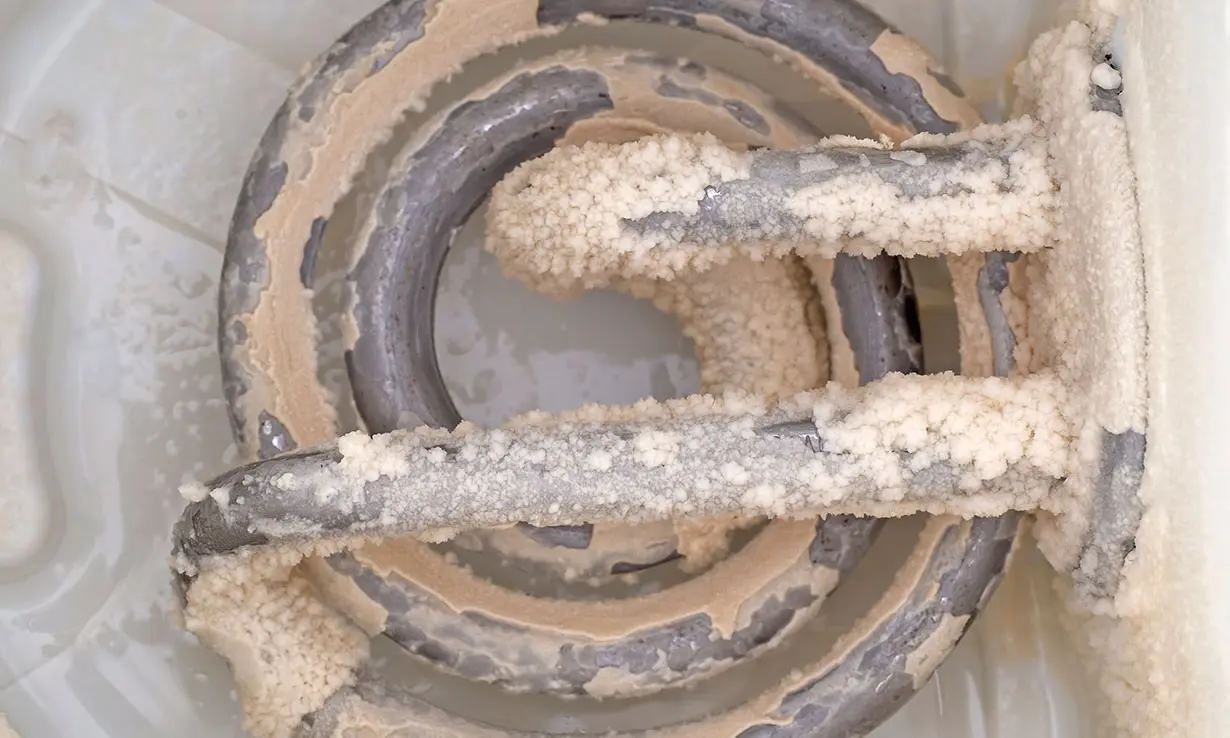
Image Source: Which.co.uk
Limescale might just look like a harmless bit of white residue inside your kettle. But honestly, this chalky horror is quietly wrecking the taste of your favourite tea and killing your kettle’s performance. That crusty layer forms when minerals like calcium and magnesium, commonly found in hard water, react to heat and evaporation. These nasty deposits cling on and just keep building up over time. Understanding how bad it is really shows you why knowing when and how to descale your kettle is so important.
Signs your tea taste is affected
Has your once-perfect brew started tasting a bit… off?. Tea experts agree – limescale build-up inside your kettle drastically changes the flavour because of all that calcium and magnesium. These minerals basically dull down all the lovely complex flavours and textures that make a good cup of tea so enjoyable.
It’s simple science, really. Those wonderful compounds in tea leaves need to dissolve properly in the water to release their taste and aroma. But hard water, full of minerals from limescale, makes this much harder. The result?
- A weak, disappointingly bland cuppa.
- Nasty bitter, harsh, or metallic flavours creeping in.
- The lovely natural aromas, which should make your tea special, just disappear.
- A weird cloudy look, especially noticeable in lighter teas.
And the absolute worst? Spotting horrible white flakes floating in your cup. Gross! Those are actual bits of limescale that have broken off from inside your kettle. As tea expert Mae King Tsang rightly points out, tea is mostly water, so the quality of that water totally dictates the taste. Rubbish water thanks to limescale simply ruins the whole experience. Forget enjoying one of the best breakfasts in London if your tea tastes grim!
How limescale damages your kettle over time
Limescale doesn’t just spoil your brew – it’s slowly destroying your kettle from the inside out. The heating element usually suffers the most. Limescale forms a barrier right on top of it, trapping heat instead of letting it warm the water efficiently.
This means your kettle has to use more and more power every time you flick it on. You’ll notice it taking longer to boil, and your electricity bills will slowly creep up. Research actually shows that kettles choked up with limescale guzzle significantly more electricity than clean ones. Every single cup of tea ends up costing you more – not ideal if you’re trying to improve your finances, maybe using tips like the ones for how to improve your credit score.
The damage goes beyond just poor performance, though. Those calcium deposits are hard and abrasive – they literally wear away your kettle’s internal metal parts. Every boil sends these minerals scraping against the metal, causing corrosion. And if you live in a hard water area, this damage happens even faster. Dealing with hard water issues is a common UK problem, a bit like needing the best dehumidifiers to tackle damp.
Eventually, this constant corrosion will just burn out the heating element completely. At that point, trying to fix the kettle is usually unsafe and just not worth it. You’ll simply have to fork out for a new one. Experts recommend you descale your kettle every four to eight weeks to stop this happening. They also mention that really thick, stubborn deposits might need a couple of treatments to get rid of them completely.
It’s a fact – kettles used in hard water areas often need replacing much sooner than those in soft water spots. Regularly knowing how to descale a kettle isn’t just about getting a better tasting cuppa; it’s about protecting your kettle and making it last longer, just like regularly knowing how to clean your washing machine keeps it running smoothly.
Choosing the Right Kettle Descaling Method
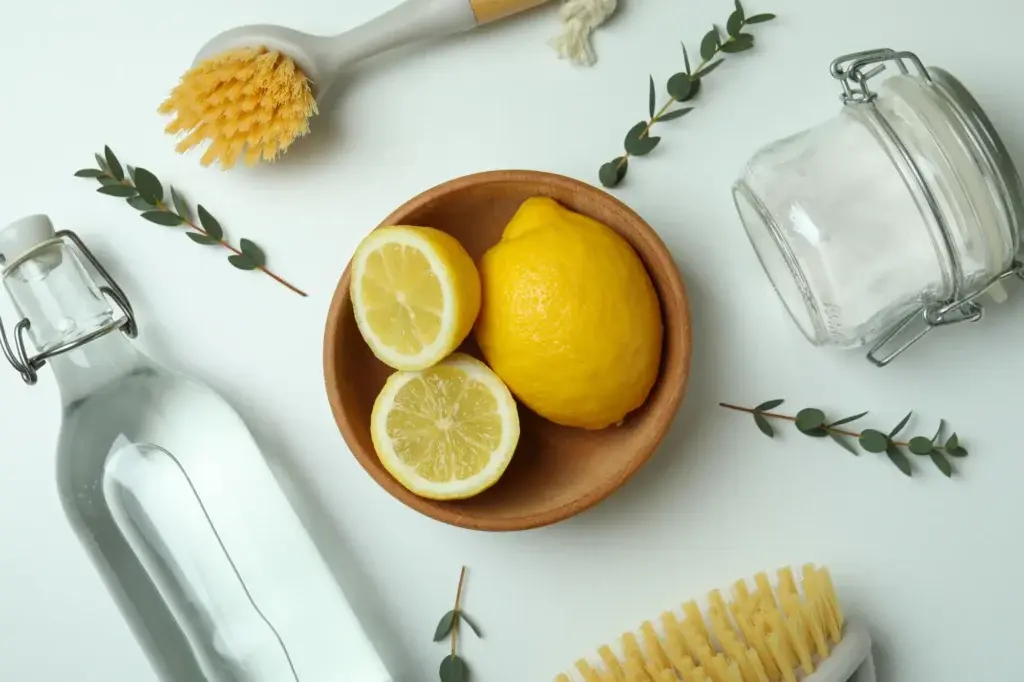
Image Source: UK Cleaning Supplies
Right, so you want to get rid of that horrible limescale in your kettle? Choosing the best way to descale a kettle really depends on a few things: what your kettle’s made of, just how bad that chalky buildup is, and frankly, what you’ve got lurking in your kitchen cupboards! Let’s break down which kettle descaling method works best for different situations.
Descale kettle with vinegar: Best for metal kettles
Good old white distilled vinegar – it’s a proper cleaning cupboard hero, isn’t it? And for good reason! Its mild acidity is brilliant at breaking down limescale without being harsh enough to damage metal surfaces. This makes vinegar a fantastic choice, especially if you have a stainless steel kettle or another metal type that can handle acidic solutions.
Ready to descale your kettle with vinegar? Here’s how I do it:
- Mix up equal parts white vinegar and water (a simple 1:1 ratio).
- Fill your kettle about three-quarters full with your vinegar mix.
- Bring it to a boil, then carefully turn the heat down and let it simmer gently for about 15-20 minutes.
- Switch it off and let it cool down completely before you empty it out.
- Now, rinse it really, really well with fresh water – I mean multiple times!
- Finally, boil a full kettle of fresh, clean water once or twice just to banish any lingering vinegar smells.
Got really stubborn limescale? You can try adding a tiny bit of baking soda to the vinegar solution for extra oomph. Leaving the solution in the kettle overnight can also work wonders, especially for heavily scaled kettles.
Lots of people worry about that strong vinegar smell hanging around. Trust me, though – if you rinse properly and do those couple of fresh water boils at the end, any vinegary whiff that might spoil your tea’s taste will completely disappear.
Using lemon juice for plastic kettles
If you’ve got a plastic kettle, lemon juice is your friend! It’s much milder than vinegar, which is great because strong acids can sometimes damage plastic. The citric acid naturally found in lemons also acts as a gentle bleach and has antibacterial properties – perfect for cleaning kettles made from more sensitive materials. Using lemon is a great natural way to descale a kettle.
Here’s the lemon method:
- Fill your kettle with equal parts lemon juice and water.
- Boil the mixture, then switch it off and let it sit for about 30 minutes.
- Empty the kettle and give it a good rinse with fresh water.
- Boil a kettleful of clean water once or twice to make sure any lemon residue is gone. It’s a bit like using lemon in remedies from my guide on how to stop coughing naturally – simple and effective!
Honestly, using store-bought bottled lemon juice works just as well and saves you squeezing lemons! You can also use citric acid powder – just add about half a teaspoon to a full kettle of water, boil it up, and let it sit.
The best bit about the lemon method? Instead of that sharp vinegar smell, it leaves a lovely fresh citrus scent, which is much nicer. People often find the limescale “soon all starts to go” once they try this! Taking care of plastic appliances is important, whether it’s your kettle or one of the best air fryers.
When to use a commercial kettle limescale remover
Sometimes, natural methods just don’t cut it. You might need to reach for a commercial kettle limescale remover if:
- The limescale buildup is seriously tough and won’t budge with vinegar or lemon.
- You live in a very hard water area (that’s usually over 200mg of calcium carbonate per litre of water).
- You just need something that works much faster than household ingredients.
- You have a fancy specialty kettle and you’re worried about damaging it.
Commercial descalers use stronger acids, specially formulated to dissolve mineral deposits quickly without wrecking your kettle’s insides. They usually come as handy powder sachets or liquids. Using them is normally dead easy – just add the product to the water in your kettle, let it sit for the time stated on the pack (often 10-30 minutes), and then rinse very thoroughly.
Safety first, though! Always wear gloves when handling commercial products, follow the mixing instructions exactly, and rinse, rinse, rinse before you even think about making a drink. The good news is many modern descalers are more eco-friendly now, using things like citric and formic acids instead of really harsh chemicals like phosphoric or hydrochloric acid.
Remember, keeping your kettle working well means you should probably descale your kettle every four to eight weeks to stop limescale getting too bad. The method you pick just depends on your kettle, how bad the scale is, and whether you prefer natural stuff or a shop-bought solution.
Step-by-Step: How to Get Rid of Limescale in Kettle
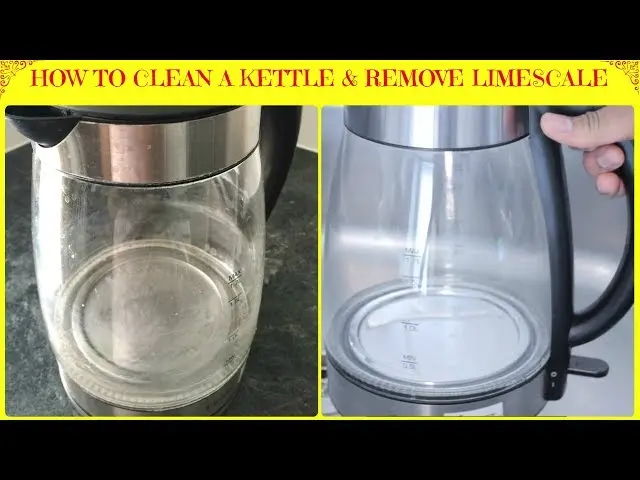
Image Source: YouTube
Getting rid of limescale in your kettle is actually pretty easy once you know the right techniques. A clean kettle doesn’t just make your tea taste better, it helps your kettle last longer too! Here’s my simple step-by-step guide to banish that pesky limescale for good and properly descale a kettle.
Quick prep before descaling
Right, safety first! Before you start any kettle cleaning, make absolutely sure your kettle is unplugged and completely cool. Don’t risk any accidents!
To get rid of any loose bits of limescale floating around, fill the kettle about a quarter full with water, give it a good swirl around, and then pour the water out.
Now, grab your supplies depending on which method you’re using:
- For vinegar: White vinegar, a measuring cup, maybe a soft cloth.
- For lemon: Fresh lemons or bottled lemon juice, water.
- For baking soda: Baking soda, water, an old (clean!) toothbrush.
- For commercial cleaners: The descaling product, protective gloves, measuring tools if needed.
Don’t forget the filter! Most kettles have a little filter in the spout – gently pop that out. Give it a good rinse under the tap to clear off any trapped limescale.
Natural descaling methods explained
Vinegar Method:
- Mix equal amounts of white vinegar and water (1:1 ratio) – enough to fill about half your kettle.
- Pop the lid on, plug it in, and boil the solution. Let it simmer gently for 15-20 minutes if you can (or just let it sit after boiling if your kettle switches off).
- Let the solution cool right down before carefully emptying it.
- Rinse thoroughly with fresh water several times.
- Boil a full kettle of fresh water 2-3 times to completely remove any vinegar smell. Easy peasy!
Lemon Juice Method:
- Fill the kettle with water.
- Add the juice of one or two lemons (or 1-2 tablespoons of bottled lemon juice).
- Boil the mixture.
- Switch it off and let it stand for 20-30 minutes.
- Empty, rinse well, and boil once with fresh water. Smells much nicer!
Baking Soda Method:
- Make a paste using one tablespoon of baking soda and a tiny bit of water.
- Spread this paste directly onto the limescale areas inside the kettle.
- Use an old toothbrush to give the limescale a gentle scrub.
- Leave the paste to sit for 5-10 minutes.
- Rinse the kettle out really well with clean water.
Citric acid (often sold in chemists or supermarkets) is another great natural option. Just mix 1-2 tablespoons with water in the kettle, boil it, and let it sit for 15-20 minutes before rinsing well. This is a key part of knowing how to descale a kettle effectively using natural items.
Chemical descaling methods explained
Commercial kettle descalers usually pack a bit more punch for tough jobs:
- Always read the product instructions carefully first! Different brands work slightly differently.
- Put on protective gloves before you handle the descaler.
- Mix the descaler with the amount of water specified on the packaging.
- Pour enough of the solution into your kettle to completely cover all the limescale buildup.
- Leave it to work for the recommended time (usually around 20-30 minutes). No need to boil unless the instructions say so.
- Carefully empty the solution out.
- Rinse the kettle multiple times with fresh water. This is super important!
- Boil at least one, preferably two, full kettles of fresh water and discard it to remove any chemical traces.
If you’ve got really stubborn limescale, you might need to repeat the process. Once you’re done, have a quick peek inside your kettle – it should look sparkling clean without any of that horrible white, chalky residue left. Success! You’ve managed to descale your kettle properly. Consistent maintenance like this helps all appliances, similar to the routine needed for how to clean your washing machine.
Troubleshooting: If Limescale Won’t Budge
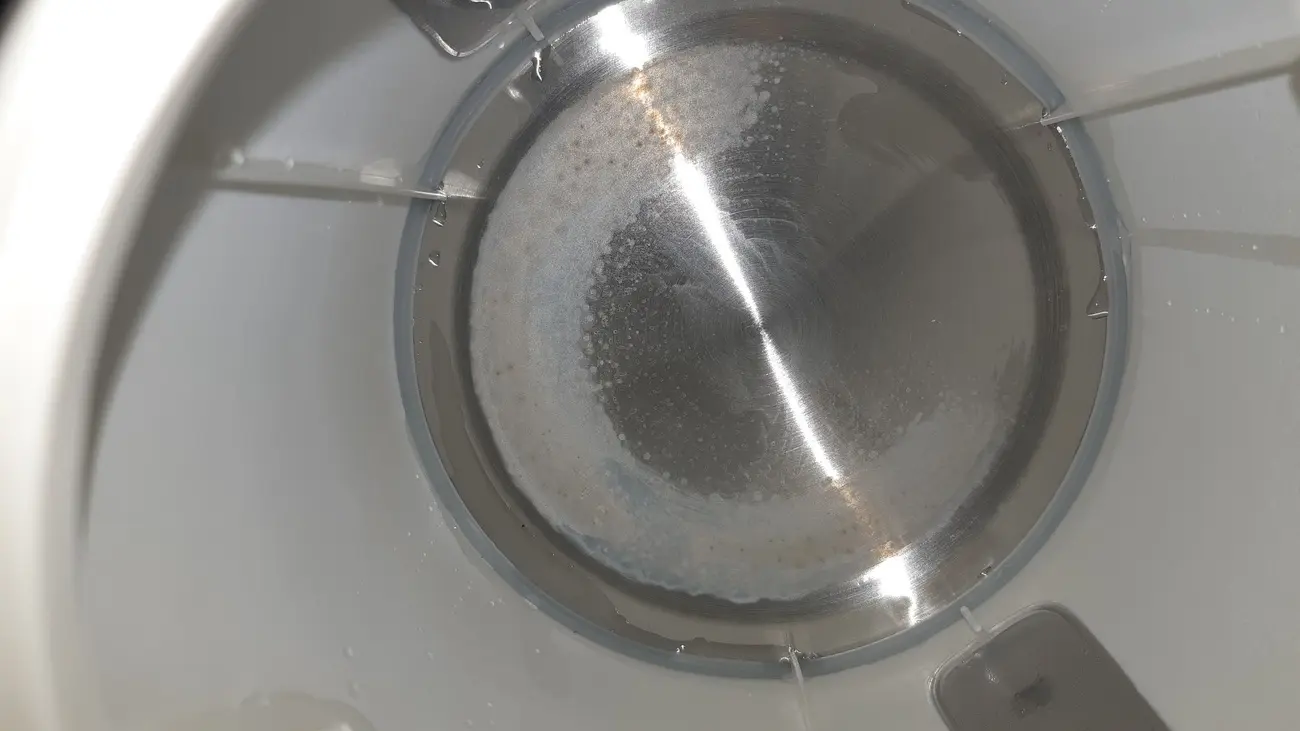
Image Source: Reddit
Right, so you’ve tried to descale your kettle, but some stubborn bits just won’t shift? How annoying! Don’t despair just yet. Sometimes those really tough limescale deposits need a bit more persuasion. Here’s how I tackle those frustrating limescale problems that cling on even after your first attempt.
Repeat treatments: When and how
Honestly, really heavy limescale sometimes needs more than one go to break it down completely. If you can still see white residue or crusty bits inside after your first kettle cleaning, it’s time for round two (or even three!).
Here are a few tricks I find help when repeating the treatment:
- Try heating the water slightly before adding your vinegar solution. Warm water helps activate the vinegar’s descaling power more effectively on really tough buildup.
- Give it more time! Letting the vinegar or lemon solution soak overnight, instead of just for an hour or so, often makes a massive difference with heavily scaled kettles.
- For really stubborn patches, try adding about one teaspoon of bicarbonate of soda (baking soda) to your usual vinegar and water mix. Just be careful and keep an eye on it – this combination can bubble up quite enthusiastically!
Scrubbing tips for stubborn limescale
Sometimes, even repeat soaking isn’t quite enough, and a bit of gentle scrubbing is needed. Chemical descalers might dissolve most of it, but getting physical can shift those last remnants.
An old, clean toothbrush is perfect for getting into awkward spots without scratching the inside of your kettle. Focus your gentle scrubbing efforts on:
- The heating element itself (especially if it’s an exposed coil type) – limescale loves sticking here.
- Around the spout where minerals often collect.
- The seams and joins inside the kettle where residue can hide away.
Kettles with those exposed heating elements often need a bit more attention around the coils, as that’s where limescale tends to build up the most. Just be gentle – you don’t want to damage anything!
When to replace your kettle
Sadly, there comes a time when even the most dedicated descaling efforts won’t save your kettle. It might be time to admit defeat and invest in a new one if you notice these signs:
- It’s taking noticeably longer to boil, even right after you’ve tried to descale the kettle. This usually means the heating element is permanently damaged from limescale buildup.
- You can see signs of the kettle’s interior flaking, pitting, or general wear and tear. This suggests the corrosion has gone too deep.
- You’ve tried multiple descaling treatments (natural and commercial) and the limescale just isn’t shifting significantly. At this point, buying a new kettle probably makes more sense than continuing the battle!
How to Prevent Limescale Build-Up in the Future
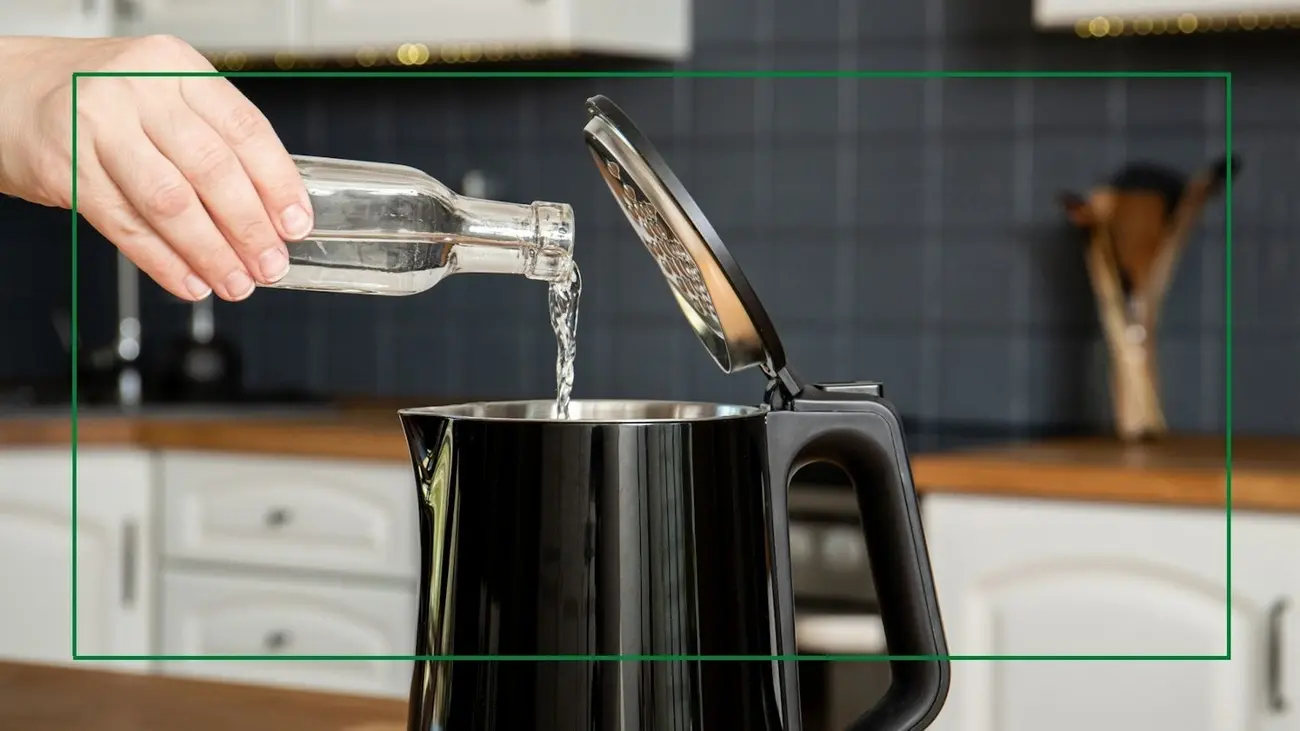
Image Source: A Modern Kitchen
Honestly, preventing limescale in your kettle is so much easier than constantly having to deep clean it later! Nobody wants the faff of repeatedly trying to descale a kettle, especially after battling really stubborn mineral deposits. The great news is, there are several simple, proven ways you can stop limescale from taking hold in the first place.
Simple daily habits to reduce limescale
Making small tweaks to how you use your kettle every day can make a surprisingly big difference in stopping limescale. A key tip? Only boil the amount of water you actually need right now, rather than filling the kettle right up every time. This simple change stops water sitting around stagnant between uses, which is exactly when those pesky mineral deposits start to form.
Another easy win is to try and keep your kettle dry when it’s not in use. If you’ve got a kettle with a flip-top lid, I find leaving it open after pouring allows those last few drops of water to evaporate properly. Living somewhere with very hard water? A quick rinse with a splash of vinegar once a month can help keep things clearer for longer.
Knowing how hard your local water is really helps too. This lets you figure out how often you ideally need to descale your kettle. Places with very hard water (that’s generally water with over 200mg of calcium carbonate per litre) will need more frequent descaling than areas blessed with softer water.
Using filtered water and kettle protectors
Using filtered water is probably one of the most effective ways to stop limescale dead in its tracks. A simple water filter jug significantly cuts down the minerals (calcium and magnesium) that cause limescale in the first place, preventing deposits before they even get a chance to build up. BRITA filters, for example, are specifically designed to reduce limescale and work particularly well if you’re plagued by hard water.
You could also invest in a kettle protector. Sounds fancy, but it’s usually just a clever little stainless steel mesh ball that you pop inside your kettle. It works by attracting the limescale particles onto its surface, stopping them from sticking to the kettle walls or, crucially, the heating element. Lots of people swear by them, saying they collect limescale “fur” on their coils and keep the kettle itself much cleaner for longer.
These kettle protectors offer some great benefits:
- They’re usually easy to clean – just rinse and squeeze under running water.
- They help your kettle last longer by preventing damaging mineral buildup.
- They keep your energy bills lower by maintaining heating efficiency (less scale = faster boiling!). Saving money on bills is always good, maybe freeing up cash like using tips for how to improve your credit score.
- They often start working quickly without needing harsh chemicals.
For really persistent limescale problems, installing a whole-house water softener system is the ultimate solution, but that’s obviously a much bigger investment than the other methods we’ve talked about.
Conclusion: Your Path to Perfect Tea!
Limescale buildup – it’s the number one enemy for tea lovers and kettle owners everywhere! But as we’ve seen, there are plenty of simple solutions. Regularly knowing how to descale a kettle is honestly your best defence against disappointing, metallic-tasting tea and kettles that waste energy and die too soon.
The best cleaning method really depends on your kettle type and just how much limescale you’re dealing with. Vinegar is brilliant for most metal kettles, while gentler lemon juice is often better for plastic ones. Don’t be afraid to use commercial products for those really stubborn deposits that natural cleaners can’t shift.
Remember, how often you need to descale your kettle depends heavily on how hard your local water is. If you’re in a hard water area, you’ll need to do it more often – setting a calendar reminder for every 1-3 months is a great idea to stop horrible buildup that damages your kettle and ruins your tea.
Beyond cleaning, simple habits like emptying unused water, leaving the lid open to dry, and using filtered water really help slow down limescale forming between cleans. And those kettle protectors? They offer fantastic extra defence, attracting minerals away from your kettle’s surfaces and heating element. It’s a small investment that can help your kettle last longer and stay energy efficient – meaning better tea and less money spent on replacements!
Trust me, preventing limescale is far less hassle than constantly battling it. Using the habits and techniques I’ve shared here will save you time and money, ensuring your tea tastes perfect every single time. A clean kettle makes a happy tea drinker – your taste buds will definitely thank you for making regular descaling part of your kitchen routine! You’ve learned how to descale a kettle, now go enjoy that perfect cuppa!
FAQs: Your Kettle Descaling Questions Answered
Q1. What is the most effective method for descaling a kettle?
A: Honestly, the most effective method for most kettles is using a simple mix of equal parts white vinegar and water. Fill your kettle about halfway, boil it, and let it sit (simmering if possible) for 15-20 minutes. Let it cool, rinse it out really well, then boil fresh water a couple of times to get rid of any vinegar smell. For super tough limescale, letting it soak overnight or adding a pinch of baking soda can help too!
Q2. How often should I descale my kettle?
A: It really depends on how hard your water is and how often you use your kettle. A good rule of thumb is every 4-8 weeks. But, if you live in a very hard water area (that’s over 200mg calcium carbonate per litre), you’ll probably need to descale your kettle more often, maybe even monthly, to stop heavy buildup. Regular cleaning keeps it working efficiently!
Q3. Can I use lemon juice to descale my kettle?
A: Yes, absolutely! Lemon juice is a great natural alternative, especially if you have a plastic kettle as it’s gentler than vinegar. Just fill your kettle with equal parts lemon juice (fresh or bottled) and water, boil it, and let it sit for about 30 minutes. Empty it, rinse thoroughly, and boil some fresh water once. Plus, it leaves a much nicer smell than vinegar!
Q4. How can I prevent limescale buildup in my kettle?
A: Preventing is definitely easier than curing! Try these simple habits: only boil the water you need each time, leave the lid open after use so it dries out completely inside, and use filtered water if possible (filter jugs are great for this). You could also try using a kettle protector – that little metal ball thingy – which attracts limescale to itself instead of your kettle.
Q5. When should I consider replacing my kettle instead of descaling?
A: Sometimes, a kettle is just too far gone! Think about replacing it if it takes ages to boil even after you’ve tried to descale the kettle properly, if you see bits of metal flaking off inside, or if you’ve tried descaling multiple times and that stubborn limescale just won’t shift. At that point, a new kettle is probably a better investment.