
You won’t believe this – over 6.8 million people search online every year trying to figure out how to tie a tie! Honestly, that number totally makes sense to me. So many people find this simple skill really intimidating, especially when you’re rushing just minutes before a big event. I’ve been there!
But here’s the brilliant news: learning how to tie a tie isn’t nearly as tricky as it looks. Trust me, you can nail the basic Four-in-Hand knot – one of the easiest tie knots for beginners – in literally two minutes with a bit of practice. It’s such a great knot because it works with almost any shirt collar and gives you that sharp, put-together look. Perfect for everything from job interviews to weddings!
Nobody enjoys that frantic feeling, fumbling with a tie when the clock’s ticking, right? That’s why I’ve put together these super simple, step-by-step instructions. This guide will help you master the quickest and easiest method – the Four-in-Hand simple tie knot. You’ll get a perfect knot every single time, whether you’re getting ready for your first big interview or just want to look smart for a special day out.
Why the Four-in-Hand is the Perfect Beginner Knot
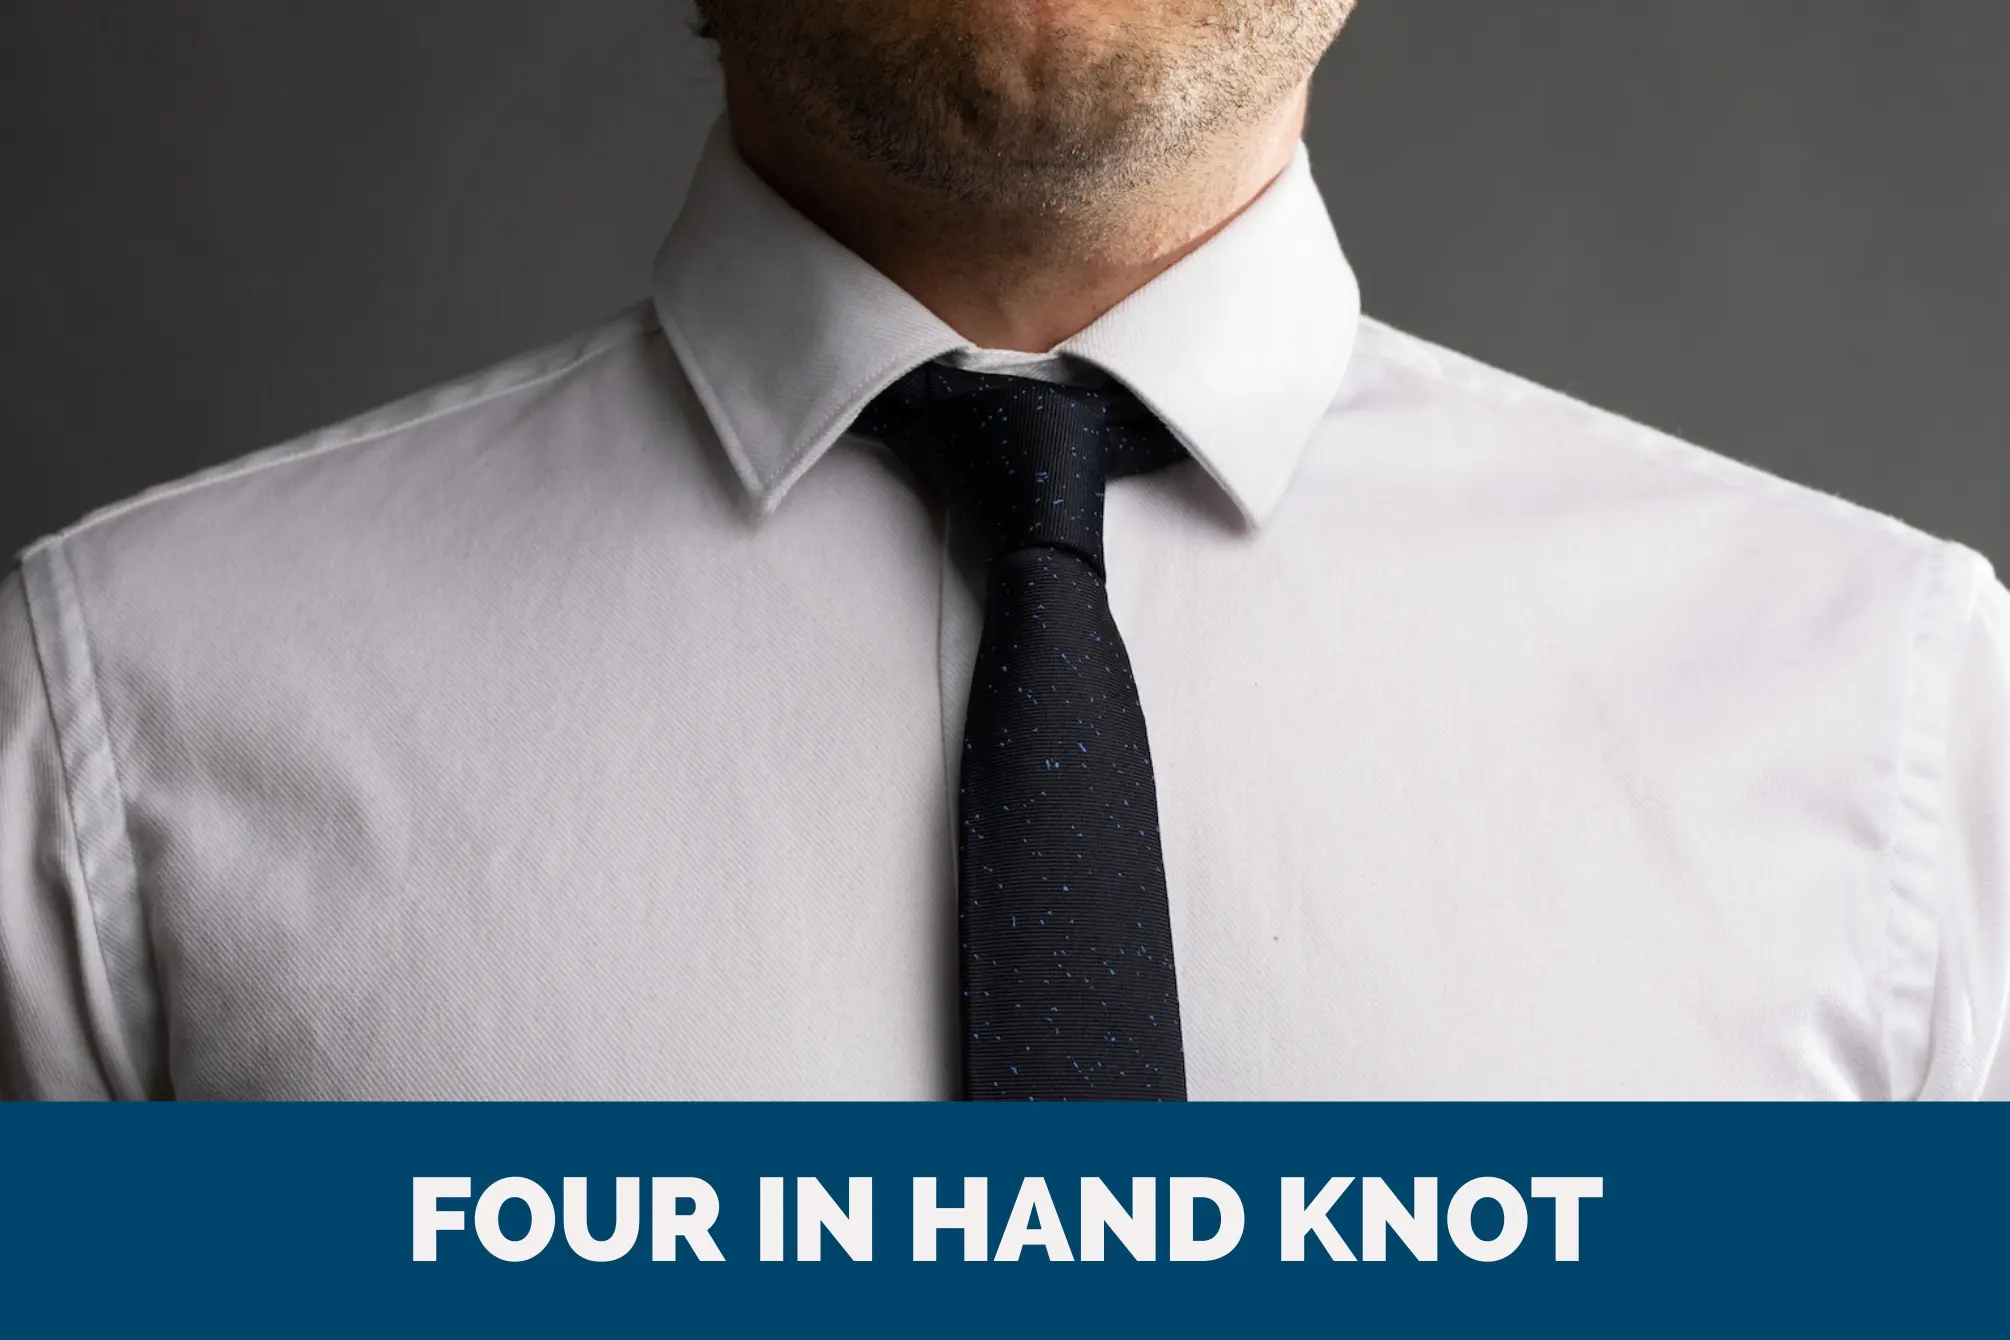
Image Source: The Modest Man
Okay, let me tell you why the Four-in-Hand knot is my absolute favourite and reigns supreme among all the necktie knots out there. People love it because it hits that perfect sweet spot between being dead simple and looking really smart. This makes it the best choice, hands down, for anyone just starting their journey of learning how to tie a tie.
The Simplest Knot with the Fewest Steps
Honestly, the Four-in-Hand truly stands out as the simplest of all tie knots for beginners. Most people probably know it as the “schoolboy knot” – it’s usually the very first one we ever learn! So, what makes this simple tie knot so incredibly easy?
- You only need a few simple fabric movements.
- The knot practically unties itself (super easy to take off!).
- It gets a tiny 1/5 rating for difficulty.
- Anyone can learn it fast with these easy steps.
Learning how to tie a tie using this method just feels natural because each step flows so smoothly into the next one. This makes it absolutely perfect for those rushed mornings when you need to look sharp, quickly!
Works with Any Collar Type
Another reason I love the Four-in-Hand knot? It adapts beautifully to pretty much every shirt collar style you can think of. Some fancy experts might say it works best with narrow or medium-spread collars, but honestly, I think this knot looks great with all types.
If you’re just starting out and maybe don’t own loads of shirts yet, you’ll really appreciate how flexible it is. The knot pairs perfectly with classic button-down collars, point collars, and even semi-spread collars. Plus, its slim shape fits neatly under jumpers or jackets with narrow lapels, giving you loads of cool style options. You could even pick up a new shirt from one of the 15 Best Places to Shop in London in 2025 and know this knot will work!
Looks Professional in All Settings
Even though it’s so easy to tie, this knot gives you an elegant, polished look that fits right in almost anywhere. The slightly smaller knot size and its subtle asymmetry look fantastic in loads of situations:
- Corporate environments (they often call it “boardroom chic”!)
- Social events and date nights
- Everyday business wear
- Smart casual get-togethers
The Four-in-Hand knot has this slender, tapered shape that actually makes your neck look a bit longer – it’s a really flattering look! It perfectly bridges the gap between formal and casual, making it ideal for everything from job interviews to weekend fun.
Seriously, the Four-in-Hand should be your go-to knot if you want to learn how to tie a tie easily. Its amazing mix of simplicity, adaptability, and professional style makes it the perfect starting point for anyone new to wearing ties.
Step-by-Step Guide to Tie a Four-in-Hand Knot
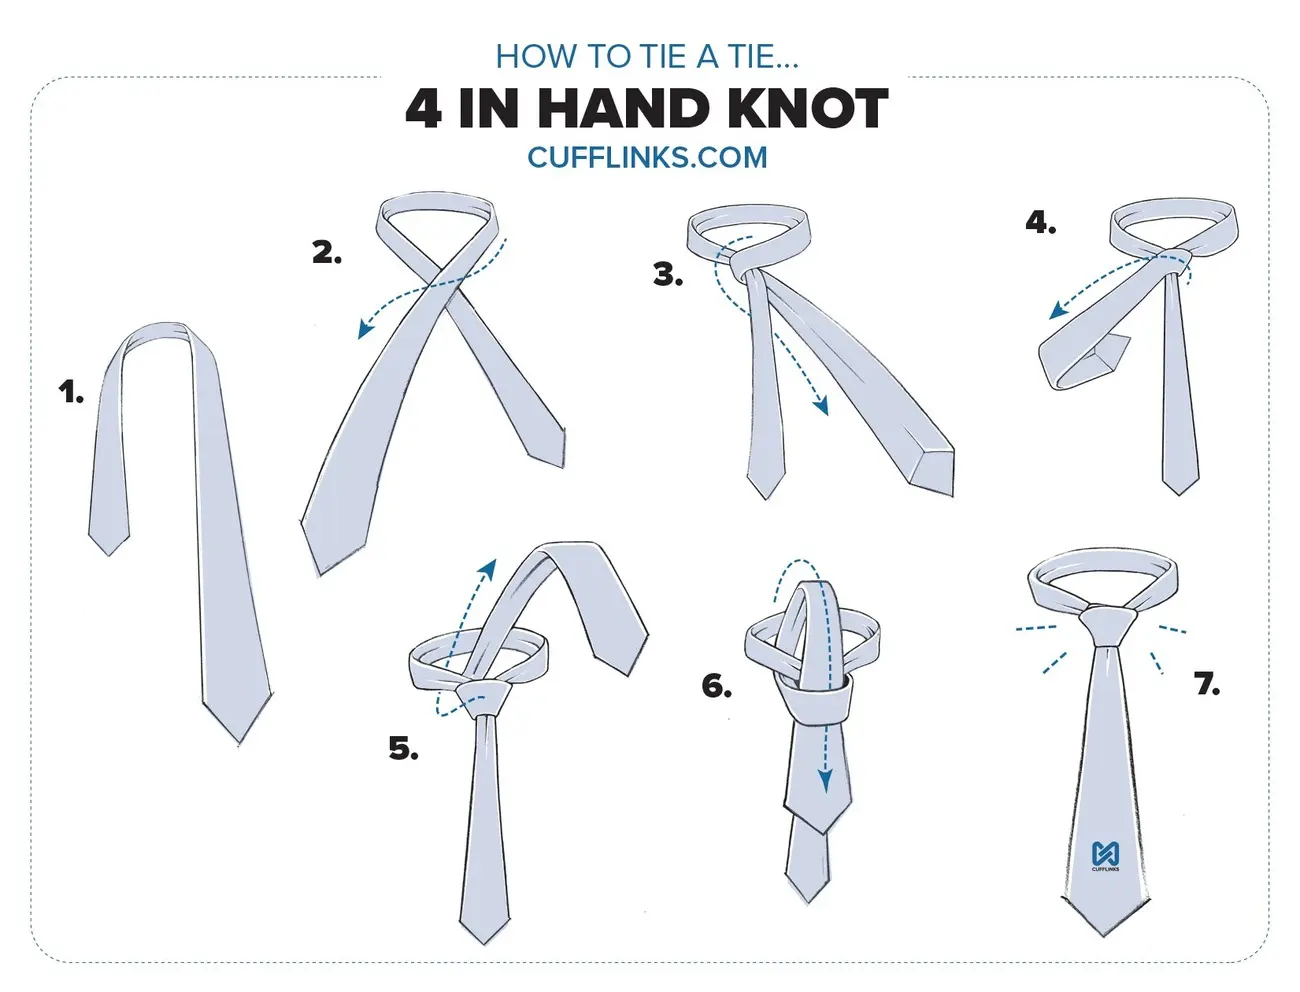
Image Source: Cufflinks.com
Right, let’s get down to it! The Four-in-Hand knot is the ideal starting point for beginners learning how to tie a tie, and you only need a few simple moves. With a little practice, you can master this slim, slightly asymmetrical knot in under two minutes. Easy peasy!
1. Position Your Tie Correctly
First things first, pop the tie around your neck. Make sure the wide end is on your right side and the narrow end is on your left. The wide end needs to hang lower – about 12 inches longer than the narrow end is usually about right. A good guide is to have the tip of the narrow end sitting just above your belly button, but this can change slightly depending on your height and the tie itself. Remember this important bit: only the wide end moves during these steps; the narrow end stays put!
2. Cross and Loop the Wide End
Okay, take the wide end and cross it over the narrow end, moving towards your left. Now, bring that same wide end under the narrow end, moving back towards your right. Next, bring the wide end across the front of the narrow end, heading back towards the left again. Phew! These first few moves create the basic shape for your Four-in-Hand knot.
3. Create the Knot
Now for the magic bit! Push the tip of the wide end up through the loop around your neck, coming from underneath. Then, bring that wide end straight down through the little front loop you just made in the previous step. You’ll see the knot start to take shape now – that distinctive slender, tapered look of the Four-in-Hand.
4. Tighten and Adjust
Nearly there! Gently pull down on the wide end to tighten the knot. Now, slide the knot up towards your collar. Wiggle it about until it feels comfortable and looks neat. Want to add a little extra touch of class? Try creating a ‘dimple’ just below the knot. You can do this by placing your index finger just under the knot and gently pinching the tie fabric together as you slide the knot up for the final tightening. It’s a small detail but really elevates the look!
A perfectly tied Four-in-Hand knot should look slightly asymmetrical (that’s normal!) and be a bit longer than it is wide. The very tip of the wide end should just about reach your belt buckle. And that’s it – you’ve learned how to tie a tie!
Common Mistakes That Slow You Down
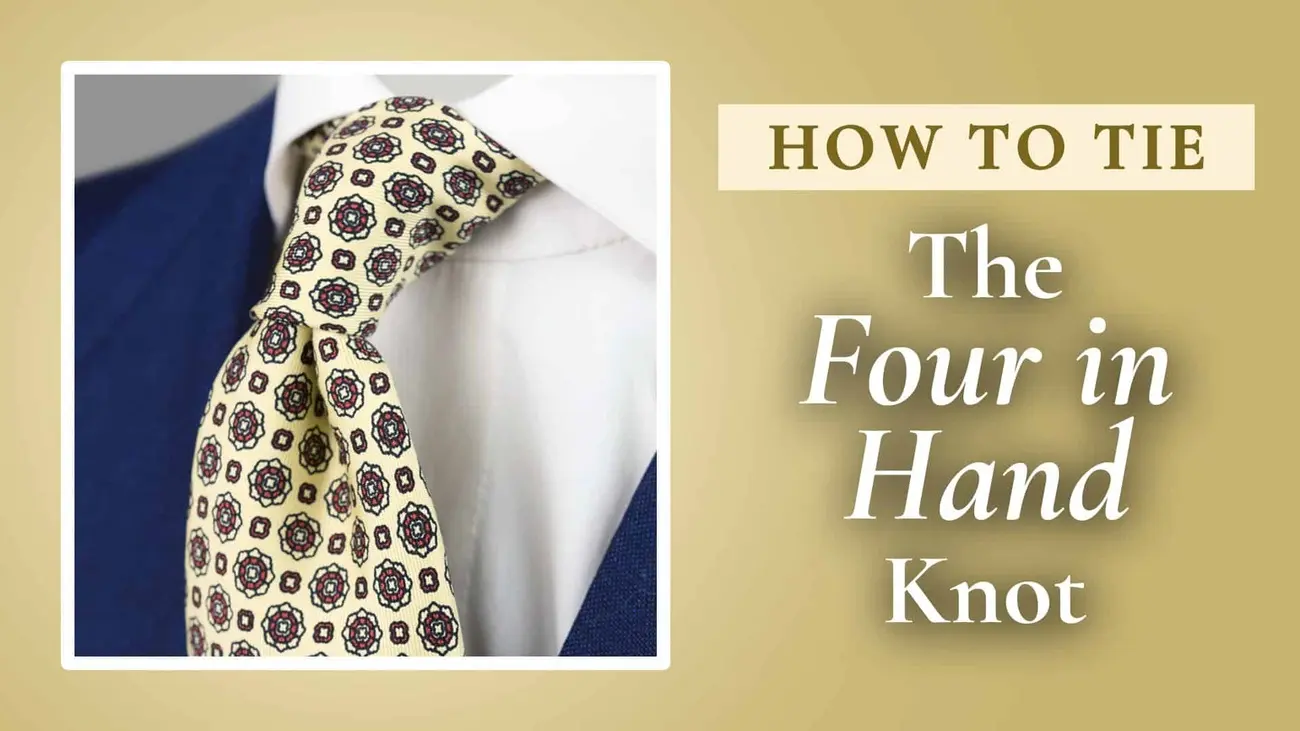
Image Source: Gentleman’s Gazette
Learning how to tie a tie perfectly does take a little bit of time, even when you know the right steps. Let’s dive into some common tie-tying pitfalls I see people make and figure out how you can easily avoid them. Trust me, steering clear of these will make things much faster!
Starting with Uneven Lengths
Honestly, how you position your tie right at the beginning can cause a whole cascade of problems later on. If you start with the ends uneven, you’re kind of setting yourself up for a bit of a struggle. Getting the narrow end’s position wrong usually means it ends up poking out way too far below the wide end when you think you’re finished. Annoying, right?
Remember, for that perfect Four-in-Hand knot, the wide end should hang roughly 12 inches longer than the narrow end. If you try and skip this initial setup, you’ll just waste time fiddling and readjusting, or even having to start all over again. Keep this goal in mind: the tip of your finished tie should land right around the middle of your belt buckle.
Creating a Loose Base
You know what looks a bit unprofessional? A weak, floppy knot that doesn’t quite fill the space between your shirt collar points. This usually happens because you haven’t created a solid foundation during those first crossing and looping steps we talked about.
The knot can end up looking lopsided or crooked, which is often a sign you rushed through the start. Plus, a loose base means your knot will probably slip down throughout the day – meaning you’ll constantly be fiddling with it. Getting the tension just right in those first couple of moves is key to creating a clean, tight knot base that stays put.
Rushing the Final Adjustment
This is where most attempts to learn how to tie a tie go a bit wrong – right at the very end! After you’ve made the basic knot shape, it’s tempting to just yank the wide end down and call it a day. But nope, this is exactly when you need to take a breath and slow down just a touch.
A really well-tied Four-in-Hand needs that careful final touch. If you rush this last step, you might end up with:
- A lopsided knot that’s missing its smart little dimple.
- The knot sitting awkwardly on your collar.
- A knot that’s either painfully tight or ridiculously loose.
Remember my tip about putting your index finger just under the knot as you tighten it? That creates the essential dimple! It’s such a tiny detail, but it makes a huge difference to the overall look and helps your knot keep its shape all day long.
Practice Techniques to Master Tying Your Tie in Under 2 Minutes
Learning how to tie a tie, specifically the Four-in-Hand knot, really just takes a bit of clever practice. Using the right techniques can help you go from feeling all fingers and thumbs to tying a perfect knot in less than two minutes. Sometimes, with enough practice, you’ll be doing it in seconds – I promise! Here are three methods I’ve found really work to speed things up.
The Mirror Method
Using a mirror is fantastic because it gives you instant feedback, which really helps build muscle memory. You can see and fix any little mistakes straight away, instead of only realising later when you look down!
Stand directly in front of a mirror, making sure you’ve got good lighting. Practice tying the Four-in-Hand knot slowly at first. Watch every single move you make to ensure you’re doing it correctly. The best thing about this is you’re seeing the knot exactly how others will see it.
Try saying the steps out loud as you do them: “cross over,” “wrap behind,” “across the front,” “up through the loop,” and “down through the front.” This combo of seeing, saying, and doing really helps lock the movements into your brain much faster than just practicing silently. It’s a great little tie tutorial for yourself!
The 5-Tie Challenge
Once you feel comfortable with the basic movements, give the 5-tie challenge a go! The idea is simple: tie five knots one after the other, trying to get a little bit faster each time.
Start at a speed that feels comfortable – focus on getting the technique right rather than just rushing. With each attempt, try to shave off a few seconds until you can consistently hit that two-minute target for tying your tie. This step-by-step approach builds both your skill and your confidence.
It’s also a brilliant way to measure your progress and celebrate those little wins as you get quicker!
Using Visual Markers on Your Tie
Using visual markers on the tie itself is, without a doubt, super helpful. These little reference points take the guesswork out of the starting position and help you get consistent results every time you learn how to tie a tie.
Want the absolute quickest trick I know? Use the fingertip-to-elbow measurement. Just stretch out your arm, hold the wide end of the tie at your fingertips, and let the narrow end reach roughly your elbow – that often gives you the perfect starting length. You could also use unique patterns or even the stitching on your tie as markers for where to position the ends initially.
Loads of ties actually have subtle maker’s marks or labels on the back that can work perfectly as positioning guides. Using these visual cues helps you develop a really natural feel for where the tie should sit, which saves valuable seconds when you’re getting ready.
Wrapping Up: You Can Master How to Tie a Tie!
See? Learning how to tie a tie definitely doesn’t need to feel like some impossible mission! The trusty Four-in-Hand knot really has proven itself as the perfect starting knot – it genuinely helps anyone pick up this skill quickly and feel confident doing it.
Honestly, using the right technique makes all the difference in the world. From my experience (and hopefully yours now too!), avoiding those common mistakes like starting with uneven lengths or having a loose base is absolutely crucial. Regular practice tying ties, maybe using that mirror method or the fun 5-tie challenge, really helps build that muscle memory without you even realising it. These simple techniques can turn what seems like a complicated task into a super quick, two-minute routine. Amazing, right?
Getting that perfect knot involves a little more than just following steps – it really is about practising until it feels natural and you build that confidence. You’ll probably find, like I did, that your Four-in-Hand knot gets smoother and faster every time you try it. This wonderfully versatile easy tie knot has definitely earned its reputation as the most practical choice out there, working brilliantly whether you’re a complete beginner or have been wearing ties for years. You’ve got this!
Your Tie-Tying Questions Answered (FAQs)
Q1. What’s the simplest tie knot for beginners?
A: Hands down, the Four-in-Hand knot is the easiest and most versatile tie knot for beginners. It needs the fewest steps, works with pretty much any shirt collar, and gives you a smart, professional look that fits loads of different occasions. It’s the perfect simple tie knot to start with!
Q2. How can I learn how to tie a tie in under two minutes?
A: You absolutely can tie a Four-in-Hand knot in under two minutes with practice! The key is consistency. Start by getting the positioning right, do the cross and loop moves, create the knot, and then finish with the tighten and adjust step. Using those visual markers on your tie can really help shave off valuable seconds too. Keep practising – you’ll be amazed how quickly you speed up!
Q3. What are common mistakes to avoid when tying a tie?
A: Oh, there are a few common trip-ups! The main ones are starting with uneven lengths (so the ends look weird at the finish), creating a loose base (making the knot slip), and rushing that final adjustment (missing the dimple or getting it crooked). Always take a moment to position the tie correctly at the start, make sure those first loops have good tension, and pay attention when tightening and creating that little dimple at the end.
Q4. How can I practice tying ties to get faster?
A: Good question! Try practising in front of a mirror – seeing yourself helps fix mistakes instantly. Give the 5-tie challenge a go; it’s a fun way to push yourself to get quicker each time. And don’t forget using visual markers on your tie for consistent starting points. These techniques are brilliant for building muscle memory and making you feel way more confident.
Q5. Is the Four-in-Hand knot suitable for all occasions?
A: Yes, pretty much! The Four-in-Hand knot is incredibly versatile. Its medium size and slightly asymmetric shape look great in formal office settings, but it’s also relaxed enough for social events or smart casual outfits. It creates a polished look that works just as well for job interviews as it does for a weekend pub lunch. It’s a real all-rounder!